A quick and easy alternative to Heroku is Railway.app
How to switch efficiently from Heroku to Railway.app


Suppose you are currently using Heroku to deploy your projects like Django apps. In that case, you should have received mail from Heroku that they are going to stop free dynos, free databases and all other free services currently provided. This was very sad, as Heroku became my favourite cloud platform last year. I chose Heroku over other cloud platforms because it provides services for free as well as the deployment process is very straightforward. You can deploy your project in very less configurations.
But now as Heroku is going to stop its free services, I had to search for another platform to deploy my existing as well as upcoming projects. At first, I explored famous platforms like Google Cloud Platform, Amazon Web Services and Microsoft Azure. But all of them provided free deployment for a limited time or limited credits.
After searching the Web, I found the Railway.app website and decided to give it a try after going through its features and free plan. A few features that I like personally are,
- Quick and easy setup
- Deploy from GitHub Repository
- Chose Database of your choice
- Automatic Deployments
- Apps do not sleep like Heroku apps
- Templates for production-ready applications
- Configurations same as Heroku
- Full access to Database unlike Heroku
The starter plan of the Railway.app includes $5.00 of usage each month with an execution time limit of 500 hours which I think is sufficient for small projects on your portfolio.
In this article, I will show you how to move your Django project from Heroku to Railway efficiently. My Octoprofile project is currently deployed on Heroku and I will move it to Railway.app.
Create new project and add Config variables
Sign up on Railway.app and go to your dashboard to create a new project. I will be deploying the project from the same GitHub repository used to deploy on Heroku. We are able to do this because configuration files like Proc file and runtime file required are the same for both platforms.
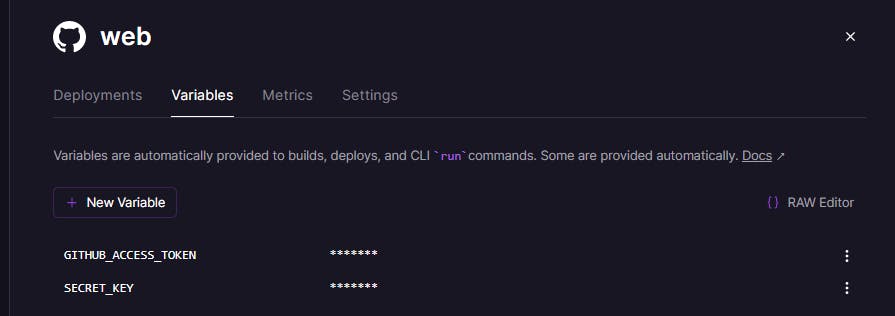
After connecting your GitHub account and selecting the respective repository, DO NOT Deploy directly because we are missing the Config variables like SECRET KEY and DATABASE URL which will fail the deployment. If your Project does not have any variables or Database connected then only you can click on Deploy Now. Click on Add variables to add variables from the Heroku dashboard.
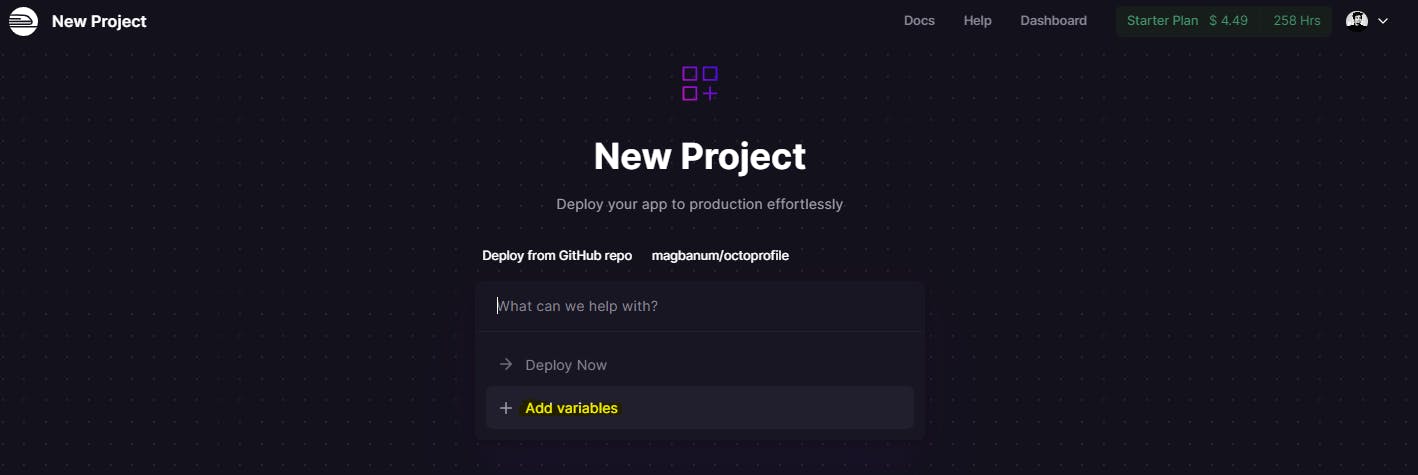
To get the variables for your project go to the Heroku dashboard and you can find Config Vars in the settings of your app. Copy and paste all Key-value pairs to Your Railway project except for the DATABASE_URL. Because we are not going to use the Heroku Database. We will create a new Database for the Railway.app project.
Create a new Database and link it to your Project
To create a new database, click on the New button inside your project dashboard and click on Database. You can select any Database like PostgresSQL, Redis, MongoDB and MySQL. I will use PostgresSQL for this project.
Once it's created, go to connect tab and copy Postgres Connection URL. Now go to your project and create a new variable DATABASE_URL and paste copied link to its value.
Note that whenever you make any changes in the project like adding new variables, every time the Railway will auto-deploy the changes. And will fail many times until all configurations are in place and this is fine. You can always check the logs to know what went wrong.
Now, you should see something like this. The deployment is successful and you will get a link to your website.

Things to do after the successful deployment.
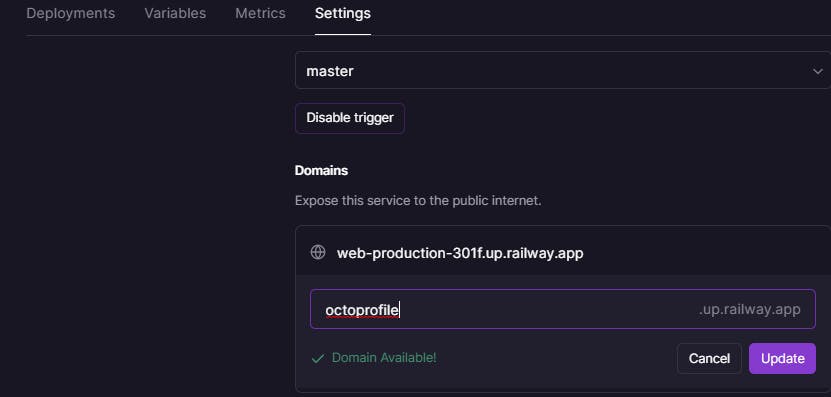
First thing is to change the default domain name provided by Railway and set it to something that makes sense. I will set it to octoprofile.up.railway.app. You can also set up a custom domain if you have one.
Now if you visit the URL, you may get Bad Request (400). This is because you might have set ALLOWED_HOST as ***.herokuapp.com in the settings.py file of the Django project. You will change it to the one provided by Railway.app.

Once you push changes to GitHub, Railway.app will deploy the changes and the site will appear on the link provided.
You can see my deployed site at octoprofile.up.railway.app. Enter your GitHub username and hit enter.
If you want to create a user just go to Postgres Database and add a new row in the auth_user table. Don't forget to give True for the is_superuser field else you will not able to login to the Admin page. Similarly, you can add other data into respective tables.

That is all to move from Heroku to Railway.app. Let me know if you want to add anything or if any steps are missed. Also, you can comment here if you get any errors while deploying so we can solve it together.
Thanks for reading. See you in the next article. 😊
Be better than yesterday's you.